How to build a REST API with Python: The Technical Set Up (Install Python 3.9, Django 3.2 and virtual environment)


Welcome to the brand new series on PYTHON called How to build a REST API with Python. In this series, I will go through a step-by-step process on how to set up, plan, design and build a REST API using Python from scratch. This is the first article from the series, and I would like to cover how to configure your computer to work on Django projects.
Some back story -
So some weeks ago my heart broke in pieces when England lost the Euro 2020 final to Italy. However what I realised while I sucked up was that, Euro 2020 comprises of 24 teams across six groups and yet we (I mean the England team😅) actually made it to finals, I mean that itself is an achievement so I decided to focus on the bright side of things, celebrate and honour these heroes (the team). Therefore I’ve decided to build an app in Python and React.JS to celebrate them called "Sporton". Yeah, let's get down to the technical bits!
Let's consider briefly why python's a unique programming language -
- Python has a simple syntax similar to English language and also syntax that allows developers to write programs with fewer lines than other programming languages.
- It gives room for programmers to develop programs with different approaches, which includes object-oriented programming, functional programming, or procedural programming.
- Python is used for a variety of system building, code evaluation tools, and system administration tools.
"Python makes me feel like I can build the world in days 😅, I guess all I'm saying is enjoy the process"
Step 1: Install Python
Download Python (with yarn) at: python.org/downloads
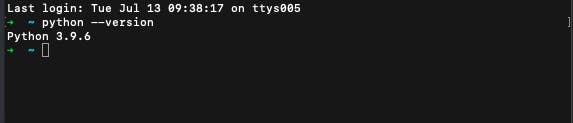
Once installed, do confirm the installation was successful, go to your command prompt and run these:
python --version
Step 2: Create a Virtual Environment
Pipenv is a tool that aims to bring the best of all packaging worlds (bundler, composer, npm, cargo, yarn, etc.) to the Python world. Create a virtual environment by running the following code in the command line:
pip install pipenv
Step 3: Install Django
Django is a high-level Python Web framework that encourages rapid development and clean, pragmatic design. It’s free and open source. Now, let’s create a new directory and install Django. First navigate to the Desktop, create a new directory django, and enter it with cd, install Django by running the following code in the command line:
pipenv install django
If you look within our directory in VSCode there are now two new files: Pipfile and Pipfile.lock.
Step 4: Activate project's virtual environment
Now we have the information we need for a new virtual environment but we are yet to activate it. Let’s do that in the project's current directory. In VSCode terminal run the following:
pipenv shell
If you are on a Mac you should now see parentheses around the name of your current directory on your command line which indicates the virtual environment is activated.
Step 5: Create a new Django project
To create a new Django project by running the following command. Don’t forget that period . at the end (I forgot a few times😬):
django-admin startproject project .
Like I said above, when I started building with python, I actually forgot the . at the end and of the command and this hindered some other installation I tried to do. So let me show you what your file structure should actually look like with . and without it.
When you run django-admin startproject project . with the .:
├── project
│   ├── __init__.py
│   ├── asgi.py
│   ├── settings.py
│   ├── urls.py
│   └── wsgi.py
└── manage.py
When you run django-admin startproject project without the .:
└── project
    ├── project
    │   ├── __init__.py
    │   ├── asgi.py
    │   ├── settings.py
    │   ├── urls.py
    │   └── wsgi.py
    └── manage.py
For successful installation, I'd advise you run the first command with a .
Step 6: Installing Pylint
Pylint is a Python static code analysis tool which looks for programming errors, helps enforcing a coding standard, checks for code errors and offers simple refactoring suggestions. If you do not have Pylint installed globally run the following command:
Install pipenv install pylint
Also add in custom config - touch .pylintrc. Note that pylint fails to run if no pylintrc is present.
Step 7: Migrations
Let’s confirm our setup is working by running Django’s local web server, but first we need to make migration and migrate to apply migration(s), this allows our project to work properly without the error message. Run the following command:
python manage.py makemigrations
python manage.py migrate
Step 8: Run Server
Let’s run Django’s local web server, by the following command:
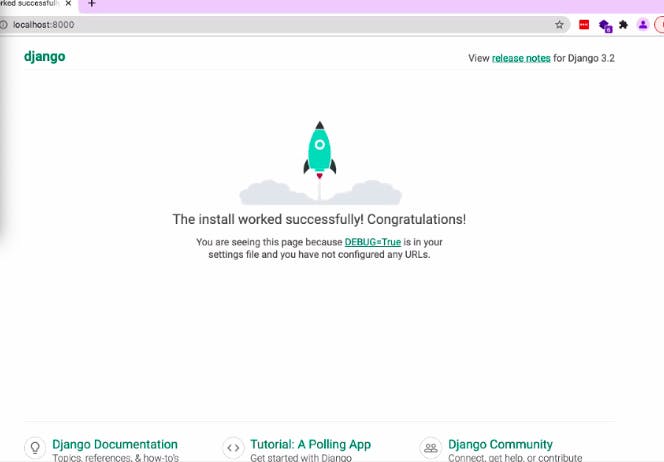
python manage.py runserver
Now go to browser localhost: 8000 to make sure the following image is visible and to confirm that our setup is working:
To stop our local server type Control+c, to exit our virtual environment type Control+d. To reactivate the virtual environment again use pipenv shell any time
We will stop here for now and hey, don't worry if it's a little bit confusing right now because you'd get to practice more as you build projects so smile😉. The basic steps is to install new packages with pipenv, activate them with pipenv shell, and then exit when done.
Let's put a pause here
Thanks for reading the first article of the series and I hope it was quite explanatory and please feel free to ask questions. Be sure to like, share this article and stay tuned for the next part where we will plan and design our API! Stay winning, you got this! Cheers🎉